We’ve all seen them, women with too much blush on or women with blush in the wrong place. Sometimes we’ve even been those women, but not anymore. By following a few simple steps you can learn to apply blush like a pro.
Finding Your Perfect Shade
When blush is applied correctly, it not only gives you that healthy glow, it can also make you look younger and slimmer. But first, you have to choose the right color for your skin tone. While shimmer is great for eyes and lips, it doesn’t work so well for blush. Try to avoid it when choosing your perfect shade of blush.
Olive Skin
Choose blush in warm, bright tones, such as peach and copper
Fair Skin
Choose colors with natural pink tones, ranging from pale to rosy
Darker Skin
Choose a blush with berry undertones, such as plum or cognac
Choosing Your Formula
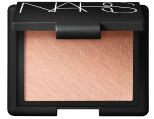
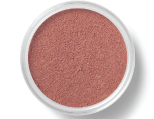
Blush no longer comes in only powder form. Today, you can find it in cream, powder, gel and liquid or stains.
Powders provide more pigment and tend to stay on the skin longer. They are ideal for oily or acne prone skin. Cream blushes deliver a more natural glow and tend to be more translucent. They work well with aging skin, as they don’t settle into fine lines.
Gels, liquids and stains run the gamut from sheer to intense pigment, and are great for creating a barely-there glow. They tend to be longer lasting then powder blush and work best on normal to oily skin but can also be difficult to work with, as they dry quickly.
Deciding which formula is right for you is really more about personal choice. Feel free to experiment until your find your perfect blush.



Applying Your Blush With Perfection
Make Sure You Have the Right Tools
Before you apply your blush, make sure you have the right tools. If you are using gels, liquids or stains, the only tool you need are your fingertips, as a brush really doesn’t work well with these types of products. For creams and powders you will need a brush, choose a smaller, doomed shaped brush. You want your blush brush to have bristles that are densely packed so it can deliver blush exactly where you want without going on too sheer.
Step 2.
Now Your Are Ready To Apply The Blush
Cream & Powder Formulas
Swirl your brush onto the blush, and then tap it on the side lightly to remove any excess product. Then, apply it to the apples of your cheeks, with a swirling motion.
Liquid & Stain Formulas
Apply with your fingers onto the apple of your cheeks and dab or rub into your skin.
Not sure where the apples of your cheeks are? Look into the mirror as you smile. Notice the circles that pop up on your cheeks as you do this. These are the apples of your cheeks and the perfect spot to apply your blush.
Step 3.
Blending
Blush should be applied and blended to balance the contours of your face. First determine your face shape and then blend following the below guide.
Round Face
For those with round faces, the goal is to draw attention away from the side of the cheeks and give your face a narrower appearance. To accomplish this, blend the blush from your cheeks towards your ears.

Square Face
Apply the brush towards the center of your face to take attention away from your jaw line and forehead.

Long Face
The object is to make your face appear wider than it is. So the blush directly along the cheekbones to exaggerate the width of your face.

Oval Face
Oval’s have a naturally balanced faces so simply apply the blush to the apples of the cheeks and your ready to go.

Step 4.
Repeat On The Other Side
Repeat steps 1 – 3 on your other cheek, making sure to match the placement and color as close as possible.
Step 5.
Set Your Look
Use a translucent powder to finish off your look and if your longing for a bit of shimmer, you can apply a little light reflecting highlighter just above your cheekbones.